Reduce, Reuse, Recycle. We’ve all heard this environmental mantra, but how often do we truly incorporate it into our daily lives? Upcycling offers an excellent way to live by these words while adding a touch of uniqueness to your life. So, why not dive in and discover the joy of upcycling firsthand?
Sourcing the Perfect Pieces
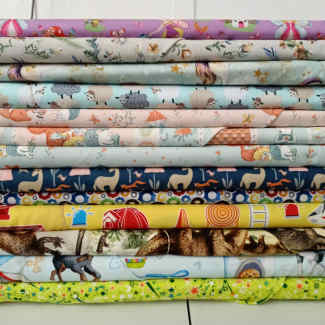
When it comes to finding the ideal items for your upcycling ventures, exploring secondhand marketplaces like Gumtree can unveil a treasure trove of hidden gems. From neglected dresser drawers to graphic tees and old jars and bottles, these platforms offer a plethora of secondhand goodies that could become your next upcycling projects. Embrace the excitement of the hunt as you browse through listings, uncovering one-of-a-kind pieces just waiting to be repurposed and reimagined. With Gumtree’s vibrant community, you’ll have access to a diverse range of options that cater to budgets of all sizes. |
Repurposed Mason Jars
Repurposing mason jars is a great DIY project, especially for beginners. Here are a few ways you can upcycle this type of glassware.
Paint or decorate
Get creative with paint. Use acrylic or chalk paint to give your jars a fresh coat and a new look. You can also create patterns and designs using stencils or masking tape. For a bit more of a rustic touch, consider distressing the paint with sandpaper.
Add a handle
Wanting to turn your jar into a hanging lantern or vase? Attach a handle using twine, wire or ribbon. This simple step can add a charming touch and will make your jars versatile for different uses.
Personalise with labels
Adding labels to the jars can give them a personalised touch. Chalkboard stickers or even adhesive paper will do the trick.
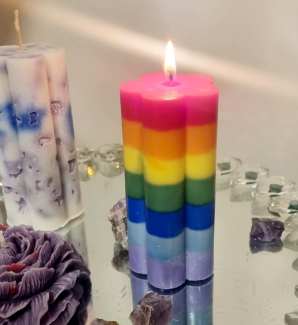
Create candle holders
Fill your jar with sand or pebbles and place a tealight or a longer candle inside. The warm glow will create a cosy atmosphere for your home.
Repurpose them for storage
Use upcycled mason jars to organise your craft supplies, kitchen spices, or bathroom essentials. Attach the lids underneath a shelf or cabinet for easy access.
Turn them into gifts
Pack the mason jars with homemade treats like cookies, layered dry soup mixes, or bath salts. Add a ribbon or a handwritten tag to these thoughtful and creative presents.
Upcycled T-Shirt Tote Bags
Transform your secondhand tees into trendy and eco-friendly tote bags. This is a fantastic upcycling project that breathes new life into your wardrobe while reducing waste and using your unwanted items to create a beautiful and unique project. With just a few simple steps, you can repurpose your favourite t-shirts into practical and stylish bags that are perfect for shopping, carrying books, or hitting the beach. Just bear in mind that you’re going to need a few sewing tools and accessories for this project.
1. Gather and prepare the t-shirts
Check that your t-shirts are clean and free from stains or tears. You’ll want to work with shirts that are still in decent condition for the best results.
2. Create your workspace
Find a sturdy flat surface where you can lay out your t-shirt. This will be your crafting area for cutting and sewing.
3. Prepare the t-shirt
Turn the shirt inside-out. This step is important as you’ll be sewing along the bottom edge to seal the bag. For extra durability, consider sewing up the sides as well.
4. Customise your tote Bag
Once you’ve sealed the bottom and sides, turn your bag right-side-out. Your new tote bag is now ready to go! Get creative by adding embellishments, attaching scrap fabric to create handles, or even adding some paint to make it truly one-of-a-kind.
Wine Bottle Craft Projects
If you’re looking for a fun and sustainable way to repurpose empty wine bottles, craft projects are the perfect solution. Transform these bottles into stunning decorative items and functional pieces for your home, making your space more stylish and environmentally friendly. Whether you’re an avid wine enthusiast or simply have some empty bottles lying around, this creative endeavor is both enjoyable and rewarding. These craft projects also make fantastic and thoughtful gifts for your loved ones.
Candle holders
This craft is easy and straightforward. Insert a tapered candle into the neck of your wine bottles, instantly turning them into charming candle holders. For an added touch of whimsy, paint the bottles with vibrant colours or wrap them with ribbons to achieve a rustic aesthetic.
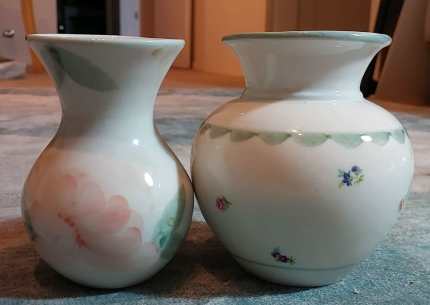
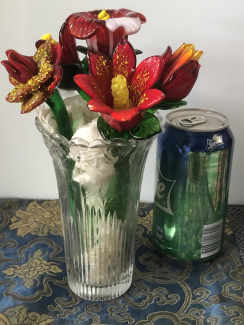
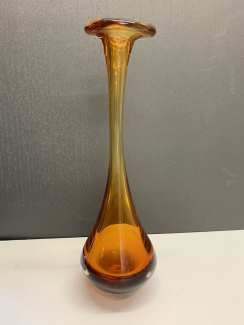
Stylish vases
1. Prepare the bottles
Carefully wash and clean the wine bottles to remove any labels, dirt, or residue. Ensure they are completely dry before proceeding.
2. Cut the tops
Since you’ll be working with glass, wear safety gloves and goggles to protect your hands and eyes. Work in a well-ventilated area to avoid inhaling any glass dust.
Using a glass bottle cutter or a glass cutting tool, score a line around the bottle where you want to cut the top off. Once you’ve scored the bottle, gently tap it with a glass cutter or use a candle to heat and cool the scoreline. This process will help the bottle separate along the scored line.
3. Sand the edges
After cutting the tops off the bottles, use sandpaper to carefully sand down the cut edges. This step is essential to achieve a smooth finish and ensure the vases are safe to handle.
4. Paint the bottles
Choose your preferred spray paint colour and apply a thin, even coat to the exterior of the bottles. Hold the spray paint can at a distance to avoid drips and runs. Allow the paint to dry completely before proceeding to the next step.
5. Add embellishments
Once the paint is dry, let your creativity shine by adding embellishments to the vases. You can use ribbons, twine, decorative charms, or any other materials that match your style and home decor.
Hanging planters
1. Gather materials
Collect the necessary materials, including empty wine bottles, a glass cutter or a glass cutting tool, safety gloves, safety goggles, sandpaper, and strong twine or ropes for hanging.
2. Clean the bottles
Thoroughly clean the wine bottles to remove any labels, dirt, or residue. Allow them to dry completely before starting the crafting process.
3. Remove bottlenecks
Wearing safety gloves and goggles, work in a well-ventilated area to protect yourself while handling and cutting the glass bottles.
Using a glass bottle cutter or a glass cutting tool, carefully score a line around the bottle where you want to remove the neck. Gently tap the bottle or use the heat and cool method to encourage the bottle to separate along the scored line.
4. Sand the edges
After removing the bottle necks, use sandpaper to smooth down the cut edges of the bottles. This step is crucial to ensure that the hanging planters are safe to handle and won’t cause any injuries.
5. Add a hanging mechanism
Attach strong twine or ropes to the wine bottles, ensuring they are securely fastened. You can tie the twine or ropes around the bottleneck area or create loops to hang the planters.
6. Plant your favourites
Fill the wine bottle planters with potting soil and carefully plant your favourite plants or flowers. Make sure to choose plants that thrive in hanging conditions and consider their sunlight and water needs.
Upcycled Dresser Drawers
If you’re new to upcycling and looking for a rewarding project, revamping a dresser is an excellent choice. Dresser drawers offer ample opportunities to get creative and transform the look of your room. Follow this step-by-step guide to tackle your first dresser upcycling project.
1. Assess the dresser
Begin by carefully assessing the dresser’s condition. Check for any repairs needed, such as loose drawer handles or uneven surfaces. Decide whether you want to retain the dresser’s original design or make more significant changes. This initial evaluation will help you plan your upcycling project effectively.
2. Prep and clean
Thoroughly clean the dresser, removing dust, dirt, and grime. If the dresser has an existing finish, consider whether you want to remove it entirely or use it as a base for your new design. Lightly sand the surfaces to create a smooth canvas for your paint or stain.
3. Choose a design concept
Select a design concept that aligns with your personal style and complements the room’s decor. Whether you prefer a rustic, farmhouse look or a sleek, modern finish, consider colour schemes, patterns, and textures to create a cohesive and visually appealing design.
4. Paint or stain
Based on your chosen design concept, pick the appropriate paint or stain. If you opt for a painted finish, use a paint brush or roller to apply thin, even coats of paint. You can add visual interest by using multiple colours or trying techniques like ombre or colour blocking. If staining, apply the stain with a brush or cloth, following the wood grain for an even application.
5. Update hardware
Updating the dresser’s hardware can make a significant difference in its overall appearance. Look for various knobs, handles, or pulls that match your design concept. Don’t hesitate to mix and match styles to create a unique and eclectic look.
6. Finishing touches
Once the paint or stain has dried, protect your newly upcycled dresser with a clear topcoat. This will provide durability and ensure that your masterpiece lasts for years to come. Additionally, consider adding decorative elements like stenciling, decoupage, or hand-painted details to elevate its charm even further.
7. Enjoy your creation
Once your dresser is fully transformed, find the perfect spot for it in your home and step back to admire your handiwork. Take pride in breathing new life into an old piece and relish the functional and aesthetic value it brings to your space. Upcycling a dresser is not only a fulfilling experience but also an excellent way to add a unique and personalised touch to your living environment.
Have Fun and Enjoy the Process
More than a rewarding and creative outlet, upcycling is a meaningful way to contribute to a more sustainable and eco-friendly world. By repurposing old items and giving them new life, we reduce waste and minimise our environmental impact. Throughout your upcycling journey, you’ll explore many different upcycling projects and will infuse your DIY projects with a personal touch. Like any hobby—have fun and enjoy the journey. Grab your tools and let your creative side shine through.